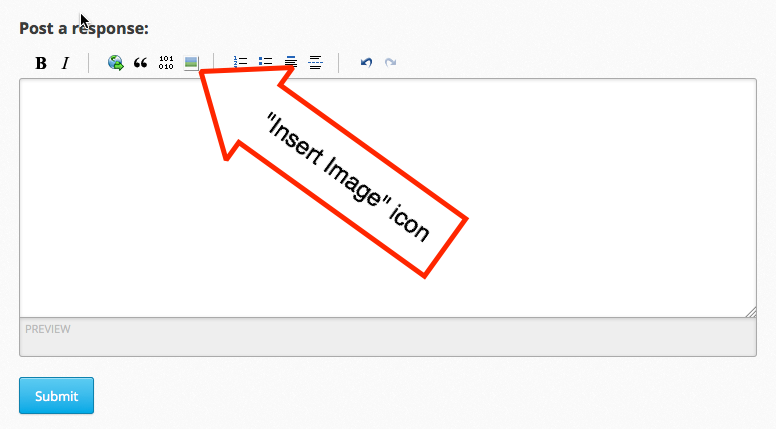
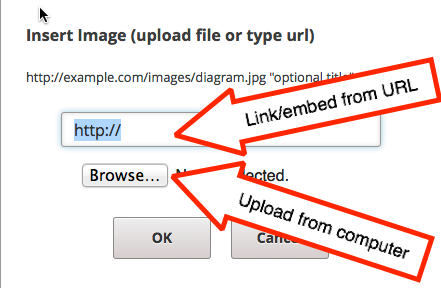
You'll be asked to share images from your community and images/videos of your building activities in Discussion. There are two main ways to attach or embed an image into a discussion post. Both start with clicking the 'image icon' and choosing to link or choosing to upload/attach.
Method 1: Linking and Embedding
If your image is posted online somewhere else you can link to it and embed it in the post. This will bring the image into the post and be seen without clicking on the link. Pretty neat! Be sure you have the URL of *image* itself. It will have a .jpg or .png at the end of the web address.
To get the URL of an image:
Method 2: Uploading and Attaching
You can directly upload and attach an image to a discussion post. There is a 10MB limit!
REMINDER: DO NOT UPLOAD IMAGES THAT DO NOT BELONG TO YOU. Meaning, please do not download images from the web and then upload to edX without permission. Any images that are not yours, that you might find online and link/embed in your post, you MUST list the source credit and the original web address of where you found the image. This is good practice and gives credit where due!
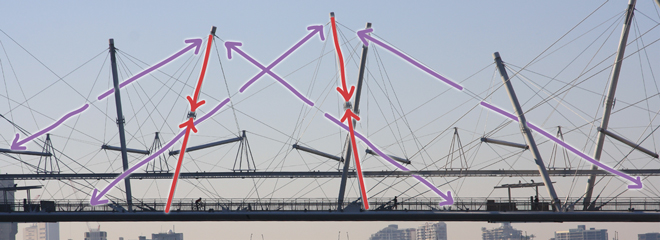
In Share Your World we'll be asking you to share images of structures in your community or on your travels. As you go through each concept, you'll learn more about how forces flow through structures. To take the Share Your World a step further, we'll be asking you to draw the flow of forces on your images.
Here is an example (our course's header graphic):
Some of you may not have software to draw on images. Below are a few suggestions of online tools and free downloads that can enable you to participate in drawing the flow of forces and share images. We do not endorse nor represent any of these tools/software/sites, please use at your own risk. Some of these sites are heavy with advertising.
If you have difficulty with sharing images or drawing on your own images, please post in Discussion! Use the 'A Course FAQ' forum!
Online editing (can draw on an image):
Download (free) image editing:
Of course - there are also numerous apps for smart phones and tablets that can also annotate/draw on pictures! Check our your device's app store.